Showing posts with label Natural. Show all posts

Thursday, June 6, 2013

Kombucha!


At some point during the last few years my brother-in-law Phillip introduced me to Kombucha. The first time I took a sip I was intrigued but also a little put off because the taste is different from anything I'd ever tried before. Since then, I've had it a few random times until recently when I've started to really discover my love for the booch.

What is it? Fermented sweet tea.
How do you ferment it? With a culture called a SCOBY (symbiotic culture of bacteria and yeast). Also known as the "mother" or "mushroom".
What does it taste like? It tastes sweet, vinegary, tangy and carbonated--all depending on how you flavor it!
Who drinks it? People all over the world. It's been consumed supposedly for thousands of years and originated in China.
Why drink it? Kombucha is thought to detox the body, boost the immune system, and supporter a healthy gut, among many other things.
How do you make it? Let me show you!

If you go into any health food store or Whole Foods you can find Kombucha for a crazy high price ranging from 3-5 dollars. That's a ton of money to spend on one drink so I wanted to find out how to brew my own. I'm a member of an awesome "natural mamas" group on Facebook and hearing about their home brews made me curious to try it myself.

The first thing I had to acquire was my SCOBY. You can buy them online from many different sites or use a baby SCOBY that you can get from a friend who brews their own Kombucha. I didn't know anyone who had a baby SCOBY ready and I wanted to make sure I got a high-quality one that was going to last for a long time, so I ordered mine online from Kombucha Kamp.

I anxiously awaited the arrival of my SCOBY and in the meantime gathered all the other tools and ingredients needed for the process:
A large glass container for the brewing vessel. I used 1 gallon.
Pure, filtered water.
Tea-loose or in bags, green or black.
SCOBY.
1 cup of started Kombucha.
Sugar
A cloth to place over your vessel.
A rubberband to hold the cloth in place and to keep fruit flies out.

I followed the recipe outlined on the Kombucha Kamp site and I watched this video as a guide as well.  The girl in that one is adorable!

First I boiled 4 cups of water. It says to use purified/bottled water, but from doing my own research and talking to others firsthand I decided to just use the filtered water from my fridge.


Then pour the boiling water and 5-6 teabags into the glass container. Or if you only have loose tea you would just need a muslin tea bag. Let it steep for 5-7 minutes.


Then remove the teas bags and dissolve 1 cup of sugar in the hot tea.


Once it's all dissolved fill the rest of your vessel with cold water. This will bring the tea down to a temperature that is acceptable for the SCOBY. If the water is too hot it could kill the culture! And you don't want to fill the vessel up the entire way because you have to leave space for the SCOBY and starter Kombucha.


Once it's full and at an acceptable temperature, you add in your SCOBY and starter tea. The SCOBY I ordered online came with the 1 cup of starter tea which was helpful because I didn't have to track some down on my own.


The tea looks lighter here because I moved it to get a better picture with more sunlight. 


At this point everything is done and you are ready to put on your cloth and rubber band to begin the fermentation process. The cloth should be breathable because the kombucha needs oxygen. Basically you let it sit in a dark (out of direct sunlight) but open (no cabinets) area for 7-21 days until you taste it and it's to your liking.  I put mine on my kitchen counter in a corner behind my blender and mixer.


I first tasted mine after 7 days but it was way too sweet, so I let it go until Day 14.  To taste it I just stuck a straw gently into the kombucha and then put it into a glass to try. Here at Day 7 you can see a new baby SCOBY forming on top. Each time you make a new batch of kombucha your mother will produce a baby. The baby can be composted, thrown away, or given to another person who can use it to start brewing their own.


This is what the baby looked like when I took the cloth off. 
Day 7. 
After another 7 days or so I tried it again and decided it was ready to be bottled. I used old Kombucha bottles for mine, but you can really use any bottle that you can seal tightly. And you can flavor it with anything that sounds good: fruit, fruit juice, herbs, ginger--really anything!  You have to remember to save 2 cups before bottling your tea. This will serve as your starter liquid for your next batch and for a batch if your baby is given to a friend. You can either immediately brew more tea and add your SCOBY to begin the process again or store it in an airtight container until ready.


This time I tried pineapple, blueberries, mint and lime, and plain. My favorite by far was blueberry! 

Where I stored my mother and baby before giving the baby to my mom. 
After they are bottled you being the second fermentation phase. Basically you let it sit on your counter (again out of direct sunlight) for 2-7 more days until it is nice and bubbly and carbonated. After a few days pass you can place them in the fridge to get cold before opening or just open them up and have a taste! Warning: because they are naturally carbonated, depending on what you use to flavor them they can really fizz when opened. I suggest opening over the kitchen sink. NEVER shake your kombucha, it CAN explode! I'm now on my third brewing process and I am loving my boocha or booch, as it's called in our house. My favorite flavorings have been strawberry and blueberry.

A few rules I've learned:
Never let metal come in contact with your SCOBY.
Never refrigerate your SCOBY.
Always use clean hands if you touch your SCOBY.
Clean your brewing vessel with only hot water and vinegar, no soap.
If you ever see mold throw your SCOBY away.

I'm having a fun time experimenting with flavors and I plan to continuously brew more kombucha until I either get sick of it or my SCOBY goes bad. It's really simple and I would love to pass along my babies to anyone interested! :) Happy Brewing! 

Wednesday, April 10, 2013

Placenta Encapsulation

I still have to write Avett's birth story, but in the meantime wanted to post about something birth-related I did for the first time with him. I had my placenta encapsulated AND I consumed it!  I know it is a completely foreign and bizarre idea for many people, and several years ago I would've felt the same way.  But now placenta discussion seems pretty normal to me because most of the moms I associate with tend to lean "crunchy" or "natural."  Although I didn't do it with Cambria or Ezra, in my mind, it seems like a very natural thing to do. We are mammals, and most mammals do consume their placentas after giving birth.  The placenta is such a life source during pregnancy, it's truly amazing. I have a friend who has an placenta encapsulation business, so I figured I'd give it a try this time.  She charges $200, but I think the average cost range is $100-$300.

There are many believed benefits to placenta consumption like helping with baby blues, increasing milk supply, and generally helping with the postpartum recovery process etc. I found this post that details how the placenta is encapsulated--it may gross some people out, just warning you.  After giving birth, my mom and sisters took my placenta back to our house in a plastic bag and Angela picked it up from them within the hour. About two days later I received my placenta package all ready to go!
Placenta print.  I plan to frame it and display it as art. 
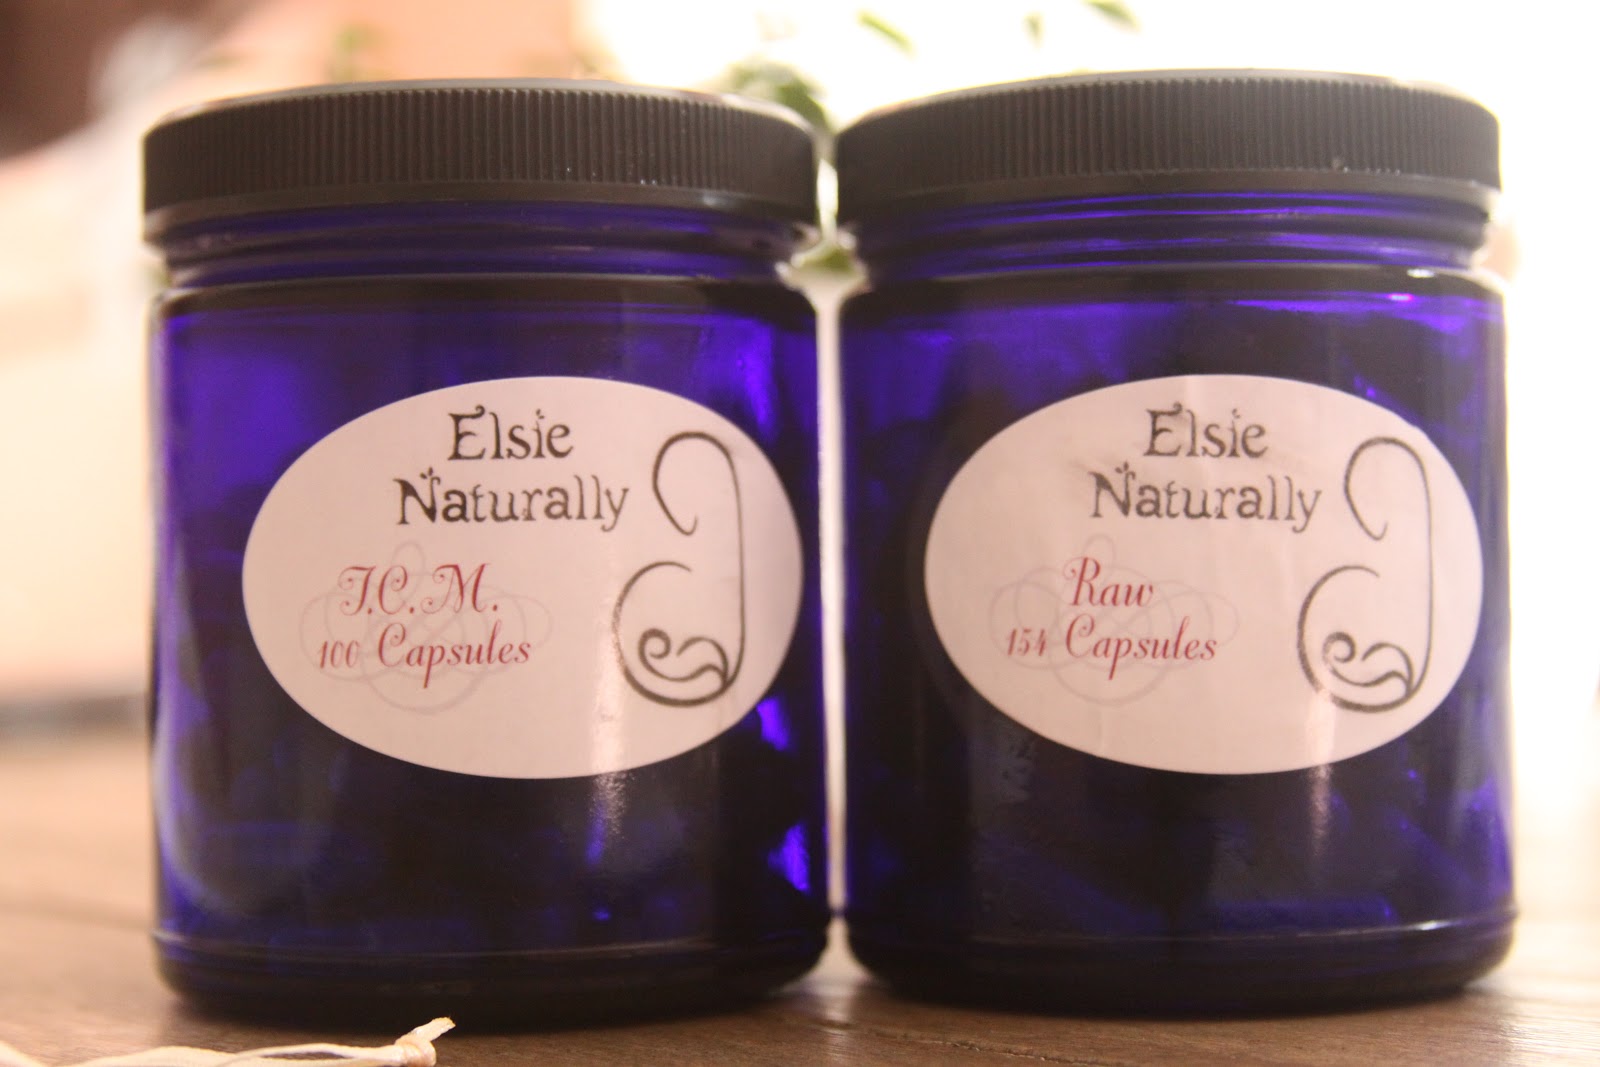
The pretty blue glass jars they came in.  She uses the two different methods labeled. 
She shapes the umbilical cord into a heart as a keepsake.
The whole package.
The pills. 
Instructions.

Do I think consuming my placenta was really beneficial? It's hard to say. I've never had postpartum baby blues or anxiety, but I've been experiencing both of those this time.  But I am also taking care of a 3 year old, a 2 year old and an infant 24/7, so part of it might be situational. My milk supply is great and physically I felt normal within a few days after birth.  I haven't consumed all of them because I want to save some of them for PMS symptoms and for a little "boost" here and there. I would definitely do it again and recommend it to anyone who may be interested!

Monday, April 23, 2012

DIY Dishwasher detergent

I'm back with my next diy switch!
I've heard lots of people talk about making their own laundry detergent {which I will be doing once ours is out} so it got me thinking about finding a recipe for dishwasher detergent.
One Google search later and I found this recipe from diynatural.com. 
It seemed simple, cheap and promising. 
Kosher salt, washing soda, borax, citric acid, vinegar, and a container to store it all in.
I bought every needed ingredient at Kroger except for the citirc acid which I found at Brighter Day, a natural foods store in Savannah.
You can also find it online. 

Homemade Dishwasher Detergent: 
1 cup borax
1 cup washing soda
1/2 cup citric acid
1/2 cup kosher salt

And the white vinegar is added to your rinse aid compartment in place of Jet-Dry.
{We actually hadn't been using anything for this before now}

So from here I just combined all of the ingredients together in an old Trader Joe's coffee can and shook it up.
 1 cup Borax
 1 cup of washing soda
 1/2 cup of citric acid
*On diynatural.com they recommended using double this amount for hard water.  Since we DO have hard water I may try this next time.
 1/2 cup of kosher salt

*Just as they recommended, to avoid clumping caused by the citric acid, I let the detergent sit out on the counter for a few days and stirred it several times each day. Even though I did this, over time large clumps did form so I simply dumped the entire mixture into my blender one day and blended all the clumps out and haven't had any since.
Make a nice label for it so no one gets confused.
And you only use 1 tablespoon per load! 
 That didn't seem like it would be enough but surprisingly it is. 

We've been using this detergent for over a month and it's worked great for us.
I would definitely recommended trying it if you're looking to save some money--this one is a no-brainer! 
There's a breakdown on the post for you here. 

Happy washing :)

Sunday, March 25, 2012

Amber Teething Necklaces

I recently purchased amber teething necklaces from the birth center for both kids.  Ezra is right in the middle of teething and Cambria is way past it, but the amber is supposed to offer benefits other than just relieving teething symptoms so I figured I'd give it a try for both of them.

"Among other things, amber is a natural analgesic (pain reliever) and anti-inflammatory. When amber is worn on the skin, the warmth of the skin releases trace amounts of healing oils on the skin. Commonly known as "teething jewelry," baltic amber has been a natural and traditional European remedy for teething discomfort for hundreds of years." source

 
Lots of moms I've recently started associating with through cloth diaper groups and a mommy bootcamp fitness class have babies who wear them, so of course I wanted them for mine too :)  It's been great getting to know so many women who are like-minded in their parenting ideas and styles because we are able to discuss things and learn from one another.  Hopefully the necklaces will have some positive effects, but either way, Cambria and Ezra will look cute wearing them!